I am officially the worst ever. Scott and I have been talking about getting Hugo's Halloween costume around the time that Halloweeny things entered the store (so like, August? haha) but we kept putting it off... and putting it off... until it was a week before Halloween and we didn't have a costume for the Hugo bear!
We were on the fence about whether or not I would make Hugo's costume. The store bought ones can be fun but my parents or grandma always made my costume (spoiled much?) so they just don't have the same appeal as something homemade, to me. There's just so much fun in the creativity and excitement of getting your costume ready. So we decided at the last minute to make Hugo's costume and instead of picking something hilarious and potentially embarrassing in adulthood, we settled on Mickey Mouse. Hugo bear loves Mickey Mouse and his little cuteness is going to be off the charts. Oh man. Check out this cuteness!
Yesterday I started working on Hugo's costume and during his initial try on I realized that he didn't have a little treat bag to match! I knew that I was going to go to the store later and figured that I would check out the selection of treat bags while I was there. Well, once I got there, and looked at their Halloween bags/buckets, I wasn't feeling too inspired. I just wanted a classic looking Mickey bag or bucket and I thought, "I should just make this." So I did, and now you can too!
Materials:
- 1/4 yd. premium felt
- 1/4 - 1/2 yd liner (depends on direction of fabric pattern)
- Spool of coordinating thread
- Embroidery floss (if personalizing)
- Needles
- Grocery ad, or similar size paper
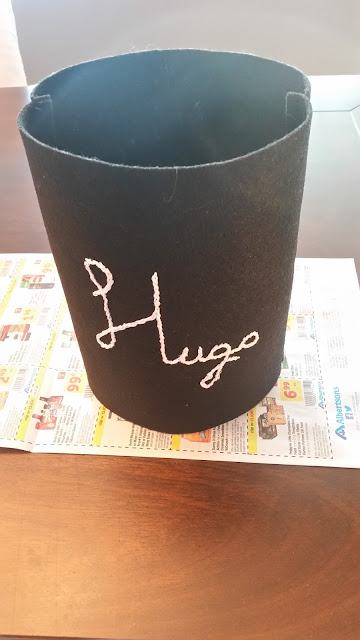
First, I searched through our junk mail for a grocery ad to use as pattern pieces. (Yay for upcycling!) and cut out 10.5 X 9" inch squares.
I pinned them to the fabric, sideways and cut them out.
And sewed the sides of the squares together on the sides at a 5/8" inch allowance. I left the top and bottom open.
Trimmed up the sides.
And pressed the seams to the side. Be sure that your iron is set to the wool setting and that you press lightly. The iron can ruin the fibers of your felt.
Time to personalize and catch up on the Gilmore Girls before the new release next month. Hello, season 7!
Grab your paper and open up the bag. We are going to trace out the bottom of our bag, including a seam allowance. Cut it out!
Pin, pin, pin and sew it up!
Trim an inch at the corners of the bottom. Sew at 5/8" inch.
Open up, placing in bag, right side out. Align the seams and pin. Sew close to the edge of the liner. Once you've sewed the liner, fold the top of the bag to your desired height and sew. You wont see the liner's raw edges. The felt is also so thick that you wont notice the raw edge of the felt when you are done either.
 |
Sew the straps to the inside of your bag. It's starting to look like something! Now we just need our ears.
Circles are not my jam so I always hunt for something about the size that I am looking for and trace around. Here, I was looking for a small-medium size. Trace and cut out 4 circles.
Now for the batting. I used quilt batting. Cut out 4 circles of your batting too.
Pin where you want your ears to go and hand stitch them in place. The felt fabric is really thick and incredibly forgiving, if you are worried about your hand stitches!
And voila, we have our Mickey Mouse inspired Trick or Treat Bag! Let me know if you try this or if you have made your own trick or treat bags. I would love to see them! :)
Here is a post-Halloween update with Hugo in his costume. The cuteness could not be contained! haha.


This is adorable! Great job!! :)
ReplyDeleteThank you so much! I was so excited that it matched his costume perfectly!
ReplyDelete