This week our little bear became sick for the first time. Instead of catching the common cold or flu, he came down with croup and strep pneumonia. Croup in itself is already pretty scary but anytime you hear the word "pneumonia" associated with an infant, it's downright terrifying. Thankfully he is doing really well now and is continuing to improve daily. Since our little bebe is still not feeling well, I don't plan to post often until he is better and this is going to be a rather quick post.
Last Sunday my sister in law and I had the honor of throwing her sister a baby shower. The celebration took place on Super Bowl Sunday (oops - that Lady Gaga performance, though!) and we had our first real snow in years. Since a real snow is rare in the Seattle area, it just made the shower all the more exciting and memorable.
After coming across maternity sashes on Pinterest, it was a DIY must. How adorable are maternity sashes and why didn't I know about them when we were expecting Hugo!? They are incredibly easy to make and so fun to customize. Even though our decorations for the shower we're pretty playful, we decided to do a sweet and elegant sash for memories.
Here's the how to!
Materials:
Here's the how to!
Materials:
- A wide ribbon
- Felt
- Silk Flowers
- Beads or Pearls
- Lace (optional)
- Hot Glue Gun/Glue
- Needle & Clear Thread
Step 1:
Determine the desired length of your sash and add your lace. I chose approximately 2.5 yards for my ribbon and a yard of lace. My lace was intended to be in the front only and end right in front of the bow. I placed the ribbon in the middle and hot glued. I also made sure to glue in areas that were thicker in the lace in order to hide any hot glue.
Determine the desired length of your sash and add your lace. I chose approximately 2.5 yards for my ribbon and a yard of lace. My lace was intended to be in the front only and end right in front of the bow. I placed the ribbon in the middle and hot glued. I also made sure to glue in areas that were thicker in the lace in order to hide any hot glue.
Step 3:
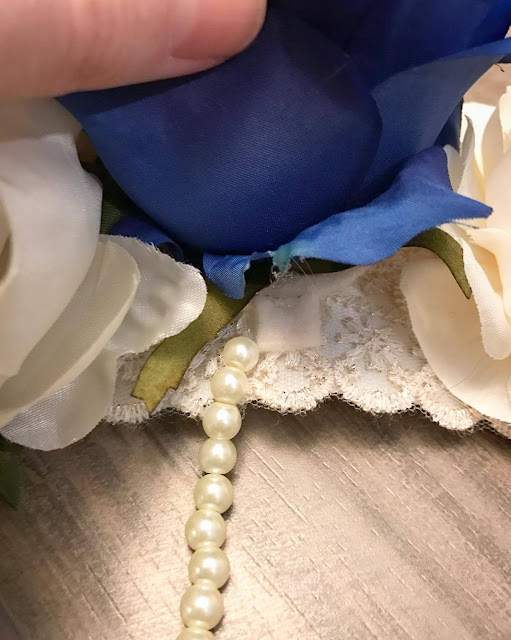
Once you have the arrangement that you want, clip the stems to where the flowers will lay flat and glue the backs of the flower to the coordinating felt. Glue the felt onto the belt.
Step 4:
Grab your pearls or beads and thread them using clear thread. Make sure you leave enough length to your thread to allow adjustments. Once you figure out your placement, hot glue a small rectangle and set the clear strand through the glue. Then glue one of the outer sides of the felt and fold it over on each end of thread. I chose 2 contrasting sets of pearls and used 2 strands of thread at different lengths.
Step 5:
Then hot glue the felt of the strands underneath the flowers according to your arrangement.
And we're done!
Sorry that the pictures are a little lacking. I finished this project around 2:30 in the morning on the day of and was too shy to ask for pictures with the mama to be while wearing it! (Who wants to be that creeper that asks, can I put this on my blog?) Anyhow, we DIYed most of the shower and here are photos of our set up! A lot the decor we pulled from Hugo's room and reused from his first birthday party.


No comments :
Post a Comment