Is it just me, or are rag dolls back and in a big way?
A few weeks ago, my husband had a late night at work so we met him in the city and decided to spend a little time walking around and showing Hugo the holiday window displays. The Land of Nod in our area always has the cutest window display and toys for the season so we decided to head there first. Inside we found such precious "heirloom" rag dolls and I just loved them to pieces but they were all thrown on the shelf and not in the best condition. Plus, they were also really expensive. Why, oh why must The Land of Nod be so cute and so expensive!
Then, I remembered all of the rag dolls that my grandma sewed for me as I was growing up and how much those meant to me then and still mean to me (they're actually being stored in our house, just waiting to be loved on again.) so I decided to make them myself! At first, I really wanted to create my own pattern for them but I was on a time crunch and needed to have something that I knew I could rely on since they were a gift. Luckily, I had Simplicity 1342 in my stash, which was really easy to modify and was an excellent base pattern.
I chose to use view B as my base pattern because the shape of her hair was a little more detailed than view A but I still wasn't sure what I wanted the overall design to look like. I loved the little Nutcracker doll at The Land of Nod and happened to find a cute book about the ballet so I knew that I was head in the direction of a ballerina but I had no idea how I was going to get there.
After checking my fabric stash, I realized that I had plenty of material to get started with a ballerina rag doll. I used scrap satin from the bridal robe I made for our elopement, the remainder of scrap lace from the diy maternity sash I made last year for a baby shower, and metallic gold embroidery floss from my attempt at making Hugo's upcycled Christmas outfit last year.
First, I cut out the satin body and basted the lace. After basting the lace, I decided to add an heirloom touch by monogramming the back, bottom right corner. I love adding fun, hidden details.
Next, I moved onto the feet and created little ballerina slippers before sewing the legs together. I also basted the champagne lace up ribbons in this step. To help prevent fraying on the ribbons, I used a lighter, heated a pin, and very lightly ran the pin along the raw edges of my ribbons. If you're too generous with the heated pin, it will melt the ribbon - so be careful!
I also added lace to create a sleeve in front before sewing and stuffing the arms together.
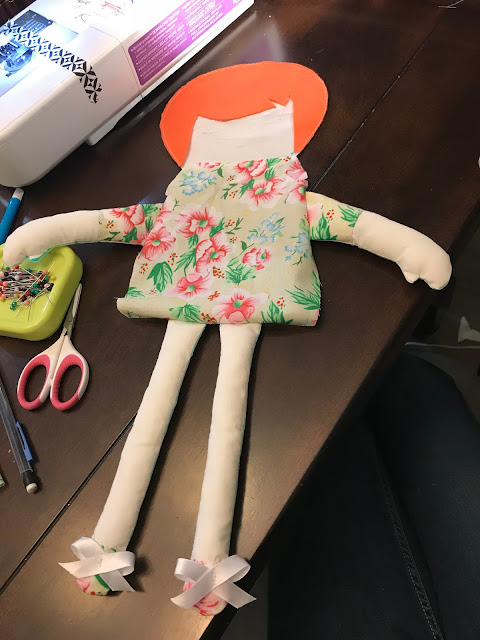
It was about this time that I realized this rag doll was getting a little fancy and very neutral so I decided to make a ginger rag doll with lots of color and patterns as well. I had left over orange felt from Hugo's diy Magic School Bus treat bag, and fabric that was gifted to me that I really enjoy but hadn't had the opportunity to use yet.
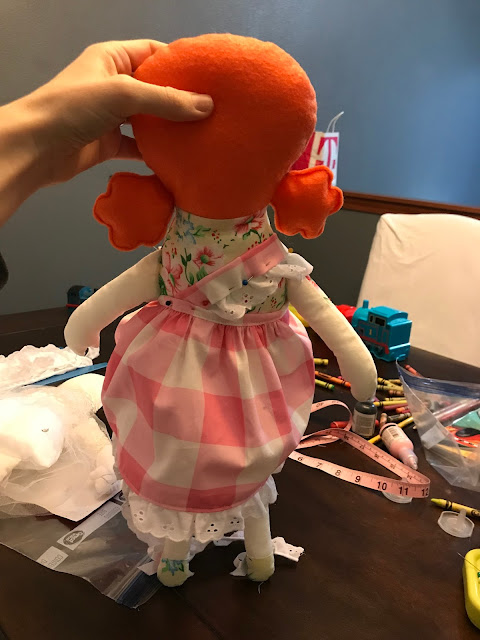
First, I started with monogramming the back in the same spot.
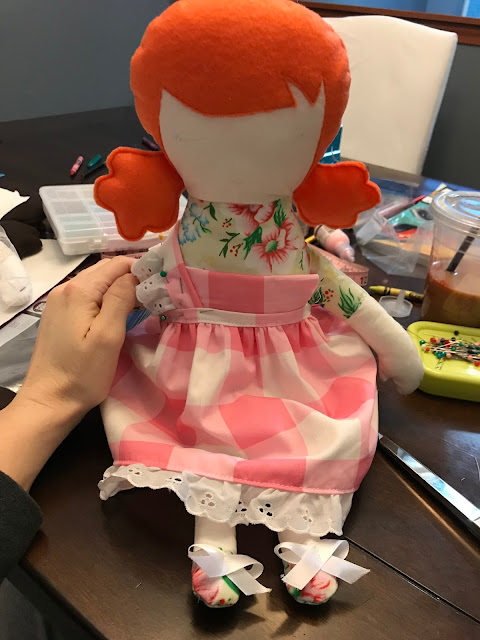
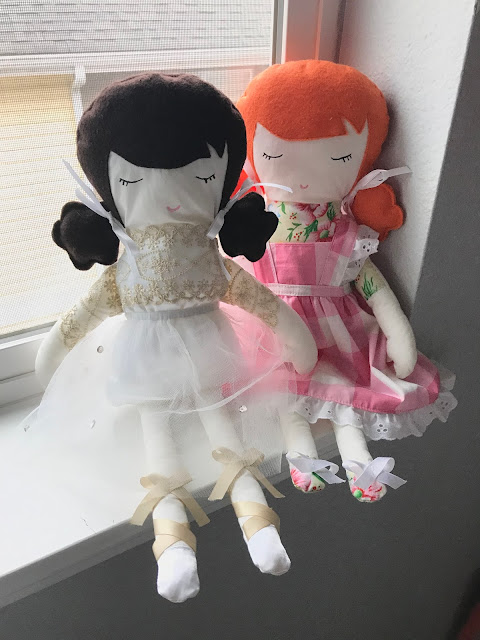
Next, I sewed the dolls together, stuffed them, and added their clothes. To create the ballerina tutu, I measured the width of the dolls waist, the desired length, and created a rectangle pattern. From there, I just cut two pieces of tulle. You'll want the width measurement to be about double the initial measurement to achieve a nice ruffle and full tutu. I sewed the two pieces together using french seams but you can easily just sew the two pieces right side together and trim. Tulle doesn't fray so you can leave edges raw. After sewing the two pieces together, I folded the top raw edge over slightly more than 1/4" and created a casing, leaving a space wide enough for elastic. After threading the elastic through, I sewed the elastic together and closed the casing. Then the fun part - embellishing with sequins!
For the ginger doll, I used the same rectangle pattern piece to create the skirt. Instead of french seams, I serged them and added lace at the hem. For the top of the skirt, I sewed two running stitches, gathered them into ruffles, and created a waistband piece from the original waist measurement. Once I finished the skirt, I measured the length from the front of the waist to the back, crisscrossed. I also measured the width of the straps I would like to see, added a seam allowance, and created a pattern piece based on these measurements. I cut out two pieces, ironed in the seam allowance, pinned the lace onto the wrong side of the fabric with the right side of the lace facing up. Then, I folded the fabric (like a hot dog) with the right side facing up, and top stitched up the side, across, and down the side. I left one side of the strap with raw edges. After you've got your straps, stitch them to the waistband of the skirt. To achieve the middle, piece, I measured my desired length and the width between straps, cut out the fabric, and top stitched it to the straps and waistband. This one is admittedly a little more involved than creating the tutu but it's definitely doable! It's just a lot of measuring but it does sew rather quickly.
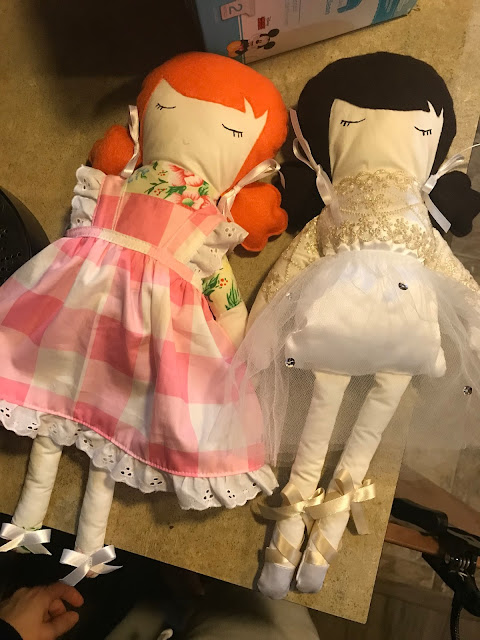
Then I finished the dolls with ribbons for their pigtails.
And this is how they turned out!
They're super cute and were so easy to do. I didn't even have to look at the instructions! Have you ever sewn an heirloom or rag doll before? What pattern do you absolutely love and why? Let me know in the comments!





No comments :
Post a Comment