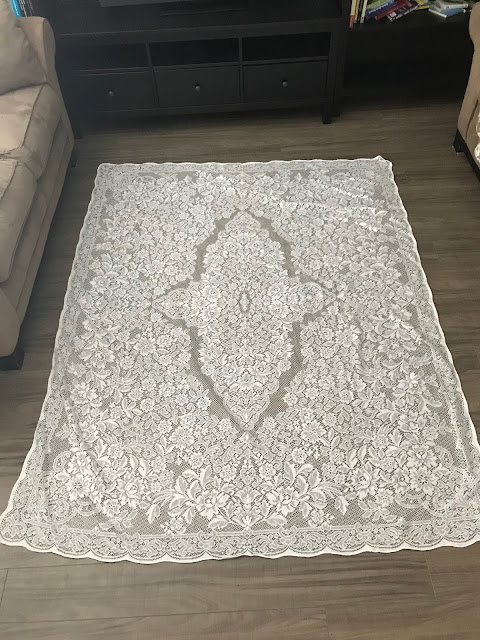
Last week I was thinking about what I was going to wear for the 4th of July and try as I might, my mind just kept drawing a blank. I will confess that I am awful and will usually buy something new for the holidays (because - dresses!) but this year has been crazy and that option wasn't really on the table. However, what was on the table (literally) was a tablecloth that I meant to sew last month and just didn't have the time to get to. I purchased this tablecloth at Value Village a few months ago for $4.99 and really liked the design in the center as well as the floral design around the border. Immediately, I thought of making a spring dress, lined with mint, and a scalloped laced hem. Needless to say, spring flew by and the tablecloth remained just that.
It wasn't until I started cleaning and moving my sewing supplies into the office sewing room that I completely re-envisioned the tablecloth. This time, I saw a dress inspired by one of my favorite H&M dresses with a vibrant navy lining. Perfect for the Fourth of July! Truthfully, the navy lining really brings the dress to life in a way that the mint wouldn't have been able to. The lace pops nicely against this color and highlights the aspects of the tablecloth that initially caught my eye.
In true refashion style, here is a good look of the before and after! However, before the grand reveal, I have to announce that the blog has had a little change and for this post, I collaborated with Seattle-New York photographer Zoe Burchard! If you haven't seen her work before, check out her website - she has an extensive background in art, fashion, and photography. You'll be seeing more of Zoe's work on my blog as we collaborate in the future.
Scroll to the bottom for the tutorial!

Want to make your own? Here's how it's done!
Materials:
- Tablecloth (mine was medium large)
- 3-3.5 yds lining
- One of your favorite dresses (don't worry - there's no cutting involved!)
- Scissors
- Ruler or hem gauge
- Thread
- Sewing Machine
- Zipper (length will depend - I used a 20-22 inch zip)
Step 1:
Grab a dress that you want to use as a pattern. I used this H&M dress.
Grab a dress that you want to use as a pattern. I used this H&M dress.
Step 2:
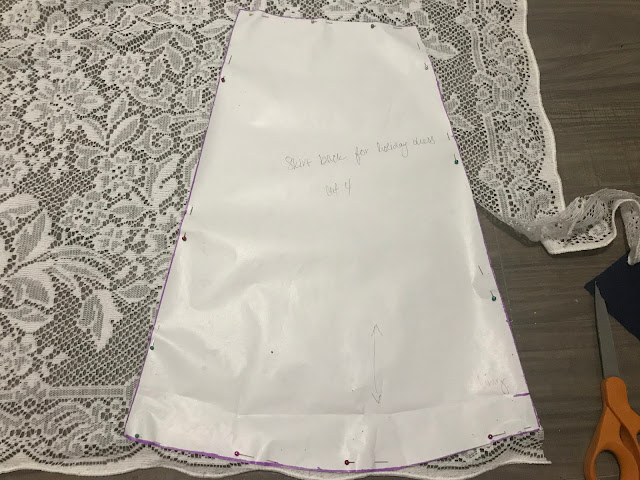
I wanted to add a couple of inches to the waist to make it wider and I also wanted a pattern that I could hold onto for later projects. With this in mind, I fold my dress in half, placed on paper, and traced out the bodice as well as the skirt. I then added my seam allowance and cut it out. This is an example of the bodice back. I had a total of 4 pieces. Bodice front (cut on the fold), Bodice Back (make sure that you cut one with the right side of the pattern up and another with wrong side of the pattern up), Skirt front (on the fold), and Skirt back (cut the same as the bodice back). To achieve the darts, I followed the same lines on the dress, cut down the line, and opened a few inches to create a v. Make sure that you measure the length and width to have an accurate dart. This part is the most time consuming.
Step 3:
Once all of your pattern pieces are sorted, pin, and cut them out. Here's how many you need to cut of each piece:
Once all of your pattern pieces are sorted, pin, and cut them out. Here's how many you need to cut of each piece:
- Bodice front: 1 of the tablecloth, 2 of lining.
- Bodice back: 1 - with pattern side up + 1 - with pattern side down (tablecloth) 2 - with pattern side up + 2 - with pattern side down (lining).
- Skirt front: 1 of the tablecloth, 1 of the lining
- Skirt back: 1 of the tablecloth - pattern side up, 1 of the tablecloth - pattern side down
Step 4:
Next, we want to sew the darts together on all of the bodice pieces.
Step 5:
Then, take one of your lining pieces and face the right side up against the wrong side of the tablecloth. The material for the tablecloth is really fragile and unravels like crazy so this lining piece is going to help stabilize the material. You'll want to baste stitch around the entire bodice. This is called an interlining. Do this for all of your bodice pieces. You should be left with one piece of lining for each section of the bodice.
Step 5:
Now it's time to really get to sewing! Take your bodice tablecloth pieces and line them up, right sides facing, and stitch down the sides only. After doing this, repeat for your lining pieces. It should look like this.
Step 6:
Now we've got to attach our lining. With the right sides facing, stitch around the sides of the bodice, the collar, and 3/4th the way of the arm holes. Leave the shoulders free of stitching. Turn it right side out and press. It should look like this.
Step 7:
Step 8:
It's time move onto our skirt. I didn't interline the skirt because I wanted 2-3 inches of lace passed the lining but I wish that I did interline the skirt because the fabric unraveled next to the seam and I had to bring the hem up a lot. It's much shorter than anything I would typically wear. If you like knee length dresses/skirts, be safe and cut out a couple of interlining pieces to stabilize the fabric!
Now, we want to sew the sides of the skirt back and front together. With right sides facing, sew down the sides. Do this for the lining as well.
See how much length I lost!? My goodness.
Step 9:
Now let's close up the back of the skirt. First, we'll want to measure the length of our zipper and mark the fabric. Sew down the skirt from the point that you marked to the bottom of the skirt. Serge or zigzag stitch all of your raw edges.
Step 10:
Step 11:
We'll do a similar process for the lining. Turn the dress inside out, separating the lining from the tablecloth piece, and arrange the right side of your lining piece to face the wrong side of the lining piece. Sew. Iron the seam downwards and turn the dress right side out.
Step 12:
Insert your zipper in the back, hem, and you are done!!
Have a happy, happy fourth of July!


No comments :
Post a Comment