I am really excited to share my first DIY of the holiday season! 1.) Because Christmas is right around the corner and it's Hugo's first Christmas and 2.) I may have a mild obsession with wreaths and all things glitteerrr. Combine all of these things, and it's gonna be a great time!
I chose to share a wreath as my first DIY of the season because they can be a little hard on the holiday budget. Quality, in style, Christmas wreaths can easily add up, especially if you have other decor to purchase. If you're picky about the overall look and fullness of holiday wreaths, then you'll really enjoy all of the customization that comes with making your own! I know that I do, and half of the time, I can achieve the look that I want for significantly less.
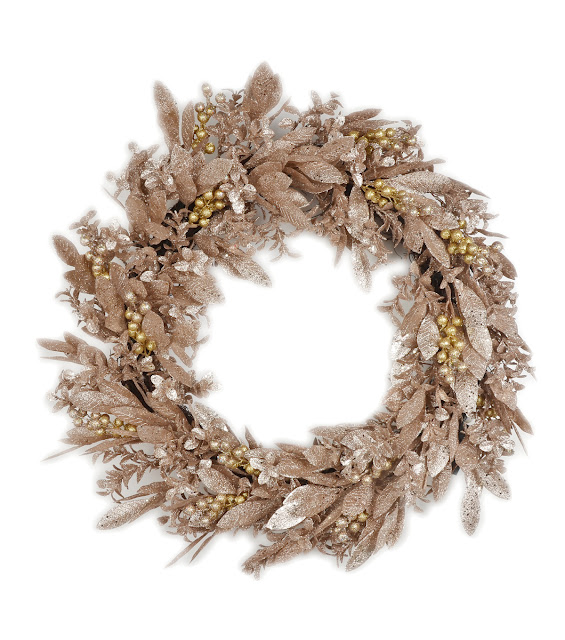
This year, I was really inspired by the glitzy spin on a traditionally rustic, woodland theme and had a general idea in mind of what I wanted to make. For additional inspiration, I searched the internet for gold, glittery, holiday wreaths and these are the two that really piqued my interest:
 |
| Drool, this is so gorgeous! It's sold but here is the link to the etsy shop. |
 |
| Glittery fun from Joanns. Currently 60% off in stores and online. |
Here's what you'll need:
- Wire cutters
- Scissors
- Grapevine Wreath - I got mine for $5.49 at Joanns and totally forgot to use my coupon. You can also score one at the Dollar Tree for $1 though the size is a bit smaller.
- Base floral piece - 3 pieces @ $2.39 a piece at joanns
- Secondary floral piece - 3 pieces @ 2.39 a piece at Joanns
- Third floral piece (to fill holes) - 2 @ 2.39 a piece at Joanns
- Accent floral piece - 1 @ 2.39 at Joanns
That's only $27 before tax! If that's still too much for your budget, you could easily do this wreath under $20 if you purchase the smaller sized grapevine wreath from the Dollar Tree. Even so, $27 is much better than the original price tag of $99.99 and half of the current doorbuster price for $40.99!
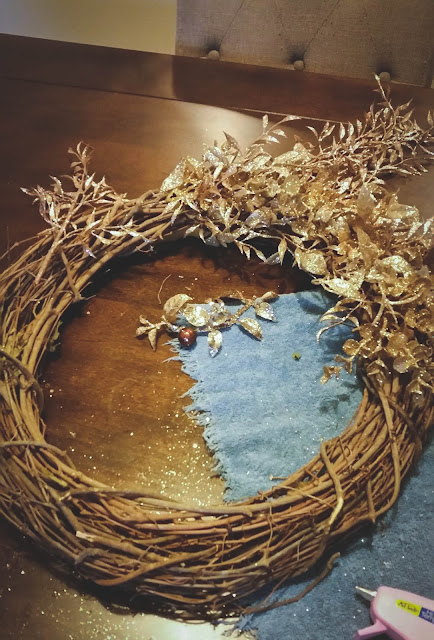
Because this is such an easy DIY, I only took a few photos of the process, but here they are:
Step 1:
For my prep, I separated the floral pieces by grouping my primary and secondary pieces together in a pile and then set the filler and accent pieces aside.
Step 2:
Start by applying your "base" or primary piece (a). I frequently changed the position of my base pieces from center, left, and right to diversify the look.
Step 3:
Next, stagger your secondary pieces (b) to fill gaps left from the base pieces (a). Then, insert a couple filler pieces (c) to achieve the desired shape and fullness. I know that it's hard to see, but I alternated placement, filled in the gaps, and played with the shape around the inside of the wreath. Too easy!
Next, stagger your secondary pieces (b) to fill gaps left from the base pieces (a). Then, insert a couple filler pieces (c) to achieve the desired shape and fullness. I know that it's hard to see, but I alternated placement, filled in the gaps, and played with the shape around the inside of the wreath. Too easy!
Step 4:
Add in your last accent piece (d) where you can. If there isn't any more room, you can cut the accent pieces off of the stem and glue to the other floral pieces wherever you like.
Sorry if the pictures aren't very helpful - it is hard to see! Stay tuned for my next DIY and in the meantime I will continue working and learning on taking better photos.
Until next time!


This wreath looks so gorgeous! Love it when DIY's are a clear winner over their super expensive versions!!
ReplyDeleteOh my goodness, me too! Thank you!
Delete