Faux Fur Tree Skirt Hack: Upcycled Faux Fur Blanket into Tree Skirt Tutorial

Thursday, December 24, 2015

UPCYCLED FAUX FUR BLANKET INTO TREE SKIRT TUTORIAL

Sorry
this is a little bit late! I am still recovering and some days are still better than others. The last couple of days have been pretty good which means that I've been trying to cram in as MUCH as I possibly can before Christmas. Although I am so behind in my holiday to do list, it is really nice to feel better than I have and just in time for the big day!

But anyways, on to the fun stuff!

I knew that I wanted to do a woodland theme this year for Christmas. My husband and I both love the earthy tones, the cute little animals, and all of the sparkle! Okay, the last part about sparkles is just me. haha. When Target first began stocking their holiday area, I noticed that they had a lot of woodland decor to offer, including this faux fur tree skirt! I loved the overall quality of the tree skirt, it was so soft and plush, however I felt that it was too expensive with a $45 price tag. So off to Joann's I went in search of the perfect faux fur in order to create my own tree skirt.


UPCYCLED FAUX FUR BLANKET INTO TREE SKIRT TUTORIAL
You can find this tree skirt here.

The Joann's in my area had a limited selection for faux fur the options weren't nearly as soft and plush as Target's faux fur tree skirt. This is when I realized that I was going to have to get creative if Joann's didn't have what I was looking for. That's when I decided to head back to Target and take a look at their holiday throws to see if I could find a soft, plush, faux fur blanket. And, I did! 

UPCYCLED FAUX FUR BLANKET INTO TREE SKIRT TUTORIAL
Threshold Faux Fur Throw, in cream. Can be bought here.

The color, texture, and price ($24.99) was absolutely perfect! Once I brought it home and started working on this upcycle, I found that it was really easy to do. It only took a little over an hour to complete and put it under the tree! Plus, it still looks so lux. You'd never know that I made it myself! 


Want to make your own? Scroll down for the tutorial!


UPCYCLED FAUX FUR BLANKET INTO TREE SKIRT TUTORIAL


christmas
christmas
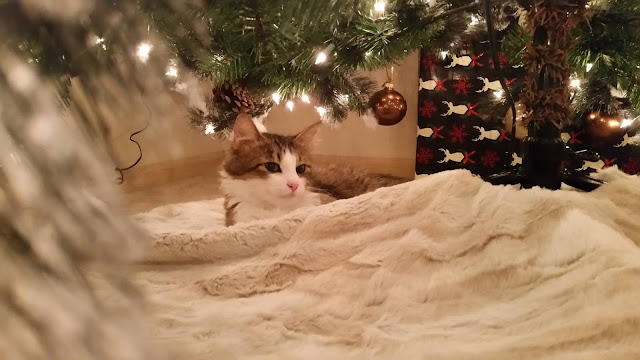
It's also Moo kitty's new favorite place!

Materials:


  • Faux fur blanket (already had batting and a back - depending on your blanket you may need these too!) - $24.99
  • Ribbon - $4

Total cost: $28.99
Savings: $16.01

Now to get started! (Disclaimer, sorry about the photos! I know that they are terrible quality!)

Step 1:

Fold your blanket in half. 

UPCYCLED FAUX FUR BLANKET INTO TREE SKIRT TUTORIAL


Step 2:

Use a template to cut out your shape. I used an older tree skirt we had at home. Line your template up on the fold, add  5/8" inch seam allowance, and cut it out. 


UPCYCLED FAUX FUR BLANKET INTO TREE SKIRT TUTORIAL

UPCYCLED FAUX FUR BLANKET INTO TREE SKIRT TUTORIAL


Step 3:

Now cut a straight line, on one side, from the outside edge to the center.
UPCYCLED FAUX FUR BLANKET INTO TREE SKIRT TUTORIAL

Step 4:

Remove any top stitching from the blanket. Once the stitching is removed, place the faux fur and backing right sides together, with the batting at the very bottom. 

UPCYCLED FAUX FUR BLANKET INTO TREE SKIRT TUTORIAL

Step 5:

Sew the outer raw edges at 5/8" inch. 

UPCYCLED FAUX FUR BLANKET INTO TREE SKIRT TUTORIAL

Step 6: 

On the sides, determine how to place your ribbons. You'll want to place your ribbons between the top and bottom of the skirt. You'll also want the short ends facing you and the rest of the ribbon tucked into the layers of fabric. Be careful not to sew over the loose ribbon inside your layers. Once you've figured out your placement, sew the sides and around the circle in the center. Make sure you leave a space in the inner circle to pull your skirt inside right!

UPCYCLED FAUX FUR BLANKET INTO TREE SKIRT TUTORIAL


Step 7:

Pull your skirt inside right, and hand sew the space in the inner circle with a ladder stitch. Faux fur fabric is also super forgiving so don't worry if you're new to hand stitching - it won't be obvious. 

Now you're all done! Let me know if you try this tutorial and what you think! 


No comments :

Post a Comment

Copyright @ Sew Very Lovely. Theme by: Pish and Posh Designs