It feels like it's been such a long time since I've wrote a blog post! The last couple of months have been a whirlwind of busy because we've moved and even though it wasn't a far move, it was so quick! The move itself is kind of story within a story but it turned out to be an incredible blessing and we are so happy with our new home as well as the location we're in. Plus, creating a home within a new house is always fun. You can count on a few diy home related tutorials coming your way as we settle in!
But, the excitement doesn't end there. I was also published for the first time in the magazine Altered Couture which is on stands now! I haven't had a chance to see a copy yet since my nearest Barnes and Noble/Joanns haven't received their copies. I really wanted to keep it a secret until I saw it in print, on a shelf, because I feel like it'll bring the anticipation and excitement of writing the article full circle. For those of you unfamiliar with Altered Couture, it's a magazine that offers diy refashion and upcycled project ideas + tutorials so if you haven't checked out a copy before, you definitely should! There are pages of inspiration and the contributors are wildly talented!
Now that we've talked about all of the exciting stuff taking place outside of the blog, let's get down to today's tutorial!
A couple of years ago I made a set of binky clips specifically for one project and I didn't write any thing down or snap photos during the creative process (yikes!) so when I was asked to revisit them for a second project, I was a little stumped. Thankfully Etsy was full of maker inspo and I loved the look of the ribbon looped binky clips they have available. They're way less bulky than my original creation and I love how quick and easy it is to make these. To learn how to make them on your own, keep reading.
Materials:
- Pacifier Clips
- Fabric
- Ribbon
- Thread
- Ruler
- Scissors
- Sewing Machine
Step One:
First, use a ruler and a piece of paper (or a ruler and chalk) and mark the measurement for your binky clips and cut it out to use as your pattern piece. The measurements are 10" x 2" with a 1/4" seam allowance. I made a pattern piece after testing the first one, in chalk, on my fabric.
Step Two:
Once you have your fabric cut out, cut your desired length of ribbon. I was a little worried about making them too small so I made mine rather large. Feel free to make them smaller!
Step Three:
Fold your ribbon into a loop and baste onto one side of the fabric, on one side of the raw edges, right sides together. Your loop should be facing in, towards the other raw side. After basting the ribbon, fold the fabric in half and pin.
Step Four:
Sew along the raw edges at 1/4" leaving one end free of stitching to turn right side out. Turn right side out and top stitch.
Step Five:
Zigzag stitch or serge the raw edge closed.
Step Six:
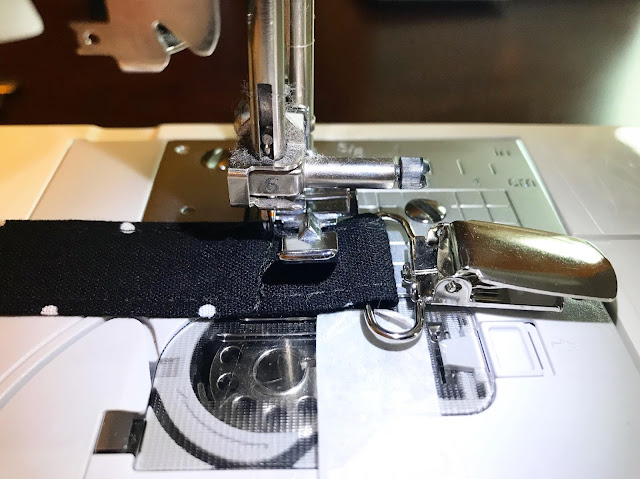
Determine which side you would like as the front. Then you'll want to slide the pacifier clip piece on accordingly. Fold over the edge 1/2" and pin.
Step Seven:
Baste and then stitch a line several times to ensure that the metal pacifier clip is nice and secure.
Now you're all done!


No comments :
Post a Comment