I know I always say this... but it's been SOOO busy! We went on an Ikea trip this weekend which means there are boxes every where, old furniture on it's way out, and just stuff every where you look. It's been driving me crazy the last few days which means my upcycling has been on hold. However, I have been sewing a few things here and there over the last week. The diy evening dress is almost done (cross your fingers that I won't have to seam rip the skirt, again.), and I've been sewing a few decorations for an upcoming shower, and a few other things that will be announced soon-ish.
So what are we going to talk about this Tuesday, you ask? The upcoming baby shower! There are so many beebs due soon and I am super excited! When my sister in law mentioned that her sister was having a baby boy in March and that it was really difficult to plan a shower from Carolina, I was more than happy to offer help with a location and planning. I love doing things like this! Plus, she registered for a bunch of burp cloths and, if you remember my DIY baby burp cloth tutorial, you know this is right up my alley. Now, I've just got to find the right fabric collection for her style.

Our shower theme is a mix of traditional, rustic, and elephants. My sister in law and I have been sending pinterest images back and forth for a week now and we didn't find exactly what we were looking for so a good deal is going to be made, including this baby shower banner. I love making my party banners because it is so much cheaper to do it, it's easy, higher quality, and you have a lot more freedom to find colors, patterns, etc. that you really like. The banner matches everything perfectly so far and we're really happy with it.
Here's how you make your DIY baby shower banner (or any party banner, really)!
Materials & Cost:
The cost may vary because I already had most of the items at home but even when I need to "restock" supplies it's always less than $5 to make!
Burlap - ~1/2 yd (already had at home)
Twine - 3 pk from the Dollar Tree (already had at home)
Felt - 1 piece from Joanns (.42 cents)
Fabric - 1/4 yd w/a good deal left over. (roughly $1.05 after sale)
Safety Pin
Blank Paper
Ruler
Total Cost: $1.47
Step 1:
First, I traced my letters for the banner and cut out the pattern.
Step 2:
Pin your letters to the felt conserving as much space as possible to alleviate waste and add to your stash for next time! Now cut them out.

Step 3:Measure and cut out the appropriate sized triangle for your letters. This will be your pattern. Place the pattern on your burlap, pin, and cut it out!
Step 4:
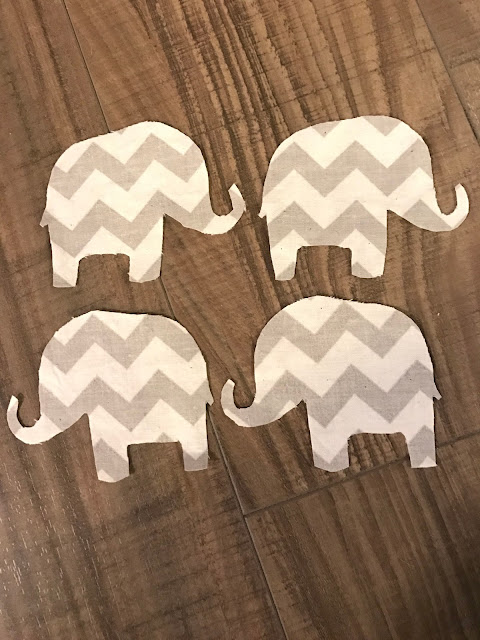
Find a graphic that will work as a pattern. For my elephants, I googled: "Free Elephant Graphic" and resized the image in google docs. Print out your graphic and pin it to your fabric. Cut it out.
Step 5:
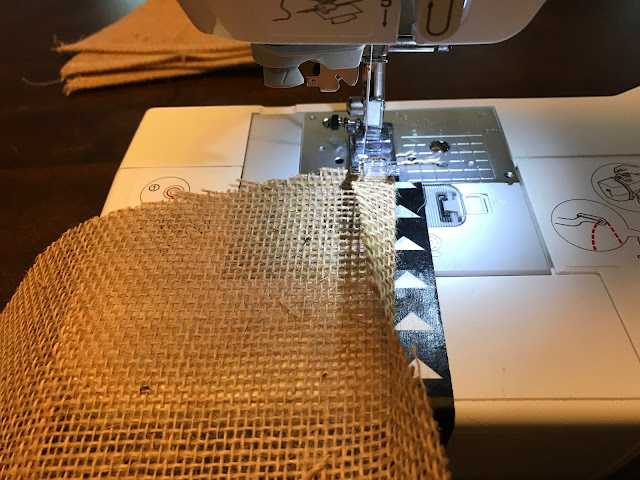
Iron your burlap (I used the wool setting) and bring it over to the sewing machine. Fold the top raw edge over about a 1/4" and sew along the bottom raw edge.
Now it's time to glue on our felt and fabric. Make sure to spread the glue evenly and lightly enough that it doesn't show glue imprints on the front of the banner. Pay special attention with the fabric because it is such a light material and can show gloppy glue easily.
Step 7:
Thread your twine through the casings of the burlap bunts. Leave enough twine at the ends to allow for spacing wherever you hang it! It's always better to have too much twine than not enough!
Super easy, super cute, and extremely inexpensive to do! If you prefer video tutorials and don't like the step by step format, you can also check out this how to in video format here. Let me know if you've made one of these before and how you used it for your party ideas!
XO,
Brittany


This is SO darling! So sweet, personal, and fun. Thanks for the easy-to-follow tutorial on how to make them!
ReplyDeleteThank you! I love making these for parties and I am excited to see everything come together!
DeleteYou are very creative this is absolutely beautiful!!
ReplyDeleteSophie x
www.sophobsessed.com
Ah, thank you so much!
DeleteI love your banner! I love that fabric for banners (especially the pre-cut ones from Hobby Lobby!) ;)
ReplyDeleteI noticed that hobby lobby had the pre-cut burlap banners the other day! I was checking out the party section while I was stopping in for fabric. They looked awesome!
DeleteI am going to be making football pennants for a gender reveal party and wanted to make it all out of felt. This tutorial will come in handy!
ReplyDeleteOhh that sounds so cute!! I'd love to see the finished banner!
DeleteSo cute! I made a burlap bunting for my wedding. It was so lovely to have as a photo prop. ~M
ReplyDeleteplanq-studio.com
They really do add a little something special to your photos! I bet that it looked lovely!!
DeleteI love this! It turned out so great and was perfect for the shower. I love the lil elephant so much :)
ReplyDeleteAww, thank you! We're excited to see how it all comes together!
Delete