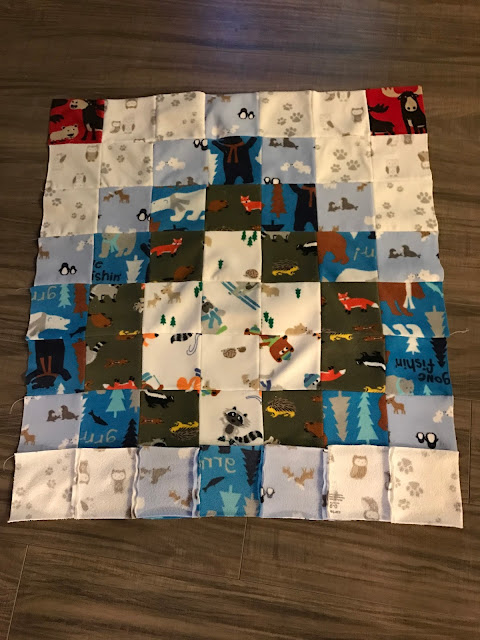
The idea kind of started when I was watching the Sister Wives one day (guilty pleasure) with my husband and in the episode, the eldest son goes off to college and their family made him this crazy photo memory quilt for his dorm room. At which point, I'm pretty sure that my husband groaned and said, 'poor guy,' while I laughed my butt off. Because, embarrassing. So embarrassing.
However, I guess the joke is on me because the idea of a memory quilt stayed with me. Only, Hugo, I promise I won't pack this into your I'm-off-to-college belongings or sneak it into your dorm. I've already gave my word to your dad that I am going to try and keep my cool that day. Although, your dad is already saying that it would be nice to move wherever you get into school and you're only 17 months old. So, maybe we'll be embarrassing in our own way. Did I mention that we love you? We love you.
Moving on.
So, each time Hugo would outgrow his pjs, I would cut them in squares and tuck them away in the craft/office room until I thought there were enough to make a Hugo-sized blankie. This was my first time ever making a quilt. I just arranged a pattern that I thought would be pleasing and then sewed the squares together in a row. After all the rows were completed, I would then attach the rows together. Since this was done over time, I can tell when I was more tired on some days because my lines weren't as straight as I would like. It's a true story that whenever I am tired, lines will kind of take on their own life.
After everything was sewn together, I laid the quilted panel on top of the backing, and batting. My front and back panels were laying wrong ways facing. Then, I trimmed around the batting and backing to line up the sides.
Then, I pinned the sides and sewed around the edges a quarter inch.
I wanted to bind the quilt with satin edges but let me tell you, mitering the corners were a pain. I'm 99.9% sure that I did it wrong so I won't tell you how I did it, just that I did. I also tried two different ways to get the corners I wanted and they were both fails. Luckily, I have a ton of binding left over. I figured that white satin would most likely not last for a long time but would be enough time to learn how to do them correctly.
The only picture that I have with Hugo enjoying his blankie is a quick snap post-nap - he's just so busy! He likes to have his snack, sippy, and blankie to help wake up. An episode of Clifford is icing on the cake! Also, guys, I am super torn about whether or not to reupholster this rocking chair. My parents recently gave it to us and Hugo loves having his quiet/wake up time in his chair but I don't see us holding on to the chair for very long because he won't sit down to rock in it. Let me know that you think in the comments! Should I update it? Would you like to see a tutorial on how to update it?


No comments :
Post a Comment